
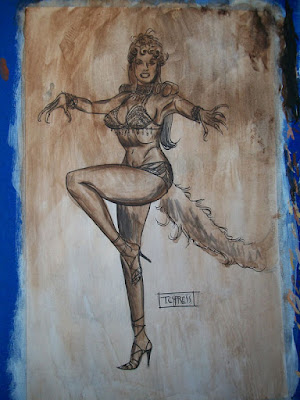
ABOVE- here is the line drawing of my painting. I used india ink in this case to ink the pencils, but usually I like to use a burnt umber acrylic ink. The Burnt Umber line work typically blends in with the finished painting for a more "lifelike" effect rather than a heavy dark india inked outline.
ABOVE- This is the underpainting. Generally you want the underpainting to be a tonal rendering of your light/dark values. In this case I didn't do a very tight underpainting...mostly just a quick block in with darks using burnt umber acrylic paint, and a light layer on top to pull the painting together. This is actually a bad example of an underpainting, but many painters might go tighter with a painting nearly finished in a tight tonal, monochromatic piece indicating light source, and shadows. I usually just want to get right into the paint/textures so I use a very simple wash, building up in layers towards a deep dark for shadows. But nothing too time consuming. The underpainting acts as a surface for your paint to adhere too, and as your layer for your shadows. Traditionally opaque painting will have portions of the underpainting showing in shadowy bits, pulling the whole painting together with harmony.
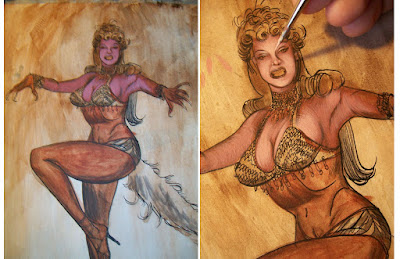
ABOVE- The painting will be completed with acrylics, an opaque medium. Traditionally acrylics, like oil paint is used by building atop layers of thinner paint with thicker paint...gradually moving from your shadowy/dark values towards your light source/light values. Here I am building my forms by painting thicker layers of light value around the form atop thinner shadow values beneath. This gives the painting dimensional, and visual form. Rule of thumb, the lightest values, and light source parts of the painting will be the thickest. Acrylic paint wont stick evenly if your too using too thin a paint atop a thicker base.
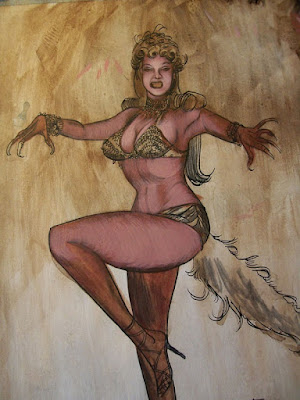
ABOVE- Here is a look at my middle values filled in. I like to get as much of the painting worked up to it's middle before dropping in the lightest values. You see the underpainting remains untouched in the background, and in portions of the figure.
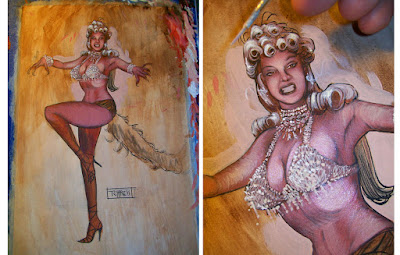
ABOVE- Ok, now I've moved toward the figure finish. I'm dropping in my light values (thickest paint), to indicate light source, and pushing the forms. Building the painting from dark towards light. I'm trying to "pull" the figure from the shadows.
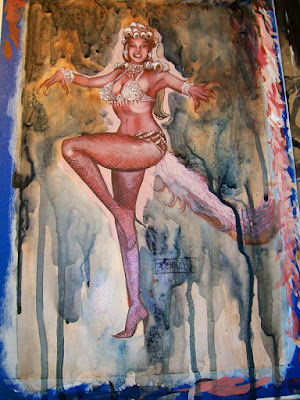
ABOVE- Whoa! What happened, I totally ruined my painting...Just kidding.
With the figure nearly done I begin work on the background. I start by adding more darks, very loosely, and thinly. I'm mostly interested in mood. Depth and drama is created with dark vs light, thick vs thin, and hard edge vs soft edge contrasts.
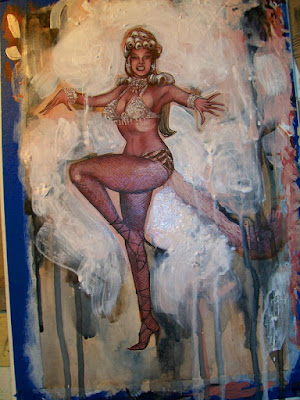
ABOVE- Nearly there. I'm dropping in my thickest paint, tightening the background, and figure. I'm trying to remain aware of "happy accidents", and allowing the paint to do it's own thing. In this phase I'm using ALOT of gloss medium to color correct, build color depth, and other special effects. "Gloss Medium" is a varnish that mixes with your acrylic color to allow the acrylics to become transparent. This way you can tint your painting with effects, and BLEND shades. Also the gloss medium re-news the original vibrancy of the acrylic color. Acrylics dry as a matt-color...losing it's "out of the tube" intensity, and saturation...so I layer gloss medium atop my painting to bring back the vibrant color. The finished acrylic painting looks more like an oil painting with blending effects, and thick impasto applications.
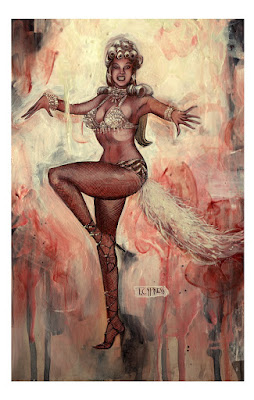
ABOVE- And the finished painting.
~T.Cypress
No comments:
Post a Comment